How to Single Crochet
December 10, 2021
Crochet is an easy craft to learn, and you only need to know a few stitches to begin making a wide variety of projects.
In this guide, you will learn how to single crochet which is the most basic stitch.
Before we begin
The first order of business is to get supplies.
Yarn is of course an essential part of the crocheting process.
So you can see your stitches more clearly, the best yarn for beginners would be neutral or pastel colored—something light on the eyes—and on the bulkier side—preferably category 4 worsted weight yarn.
Avoid textured, single ply, or variegated yarn because they are difficult to work with.
A crochet hook is what makes everything happen.
Since you are using category 4 worsted weight yarn, a 5.5 or 6 mm hook is needed. Inline hooks can help a beginner to maintain tension better.
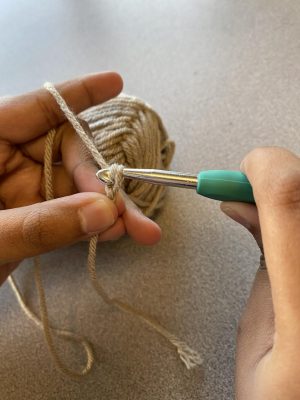
To get started you need to make a slip knot.
Step 1
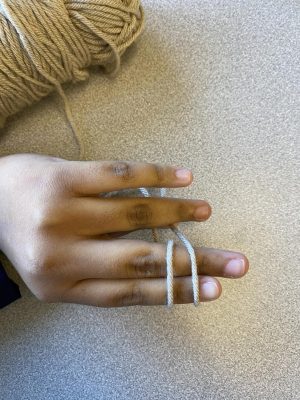
A slip knot is the first step in almost all crochet projects.
You will start by pulling 6 inches from the free end of the yarn and then wrapping it around two fingers twice.
Then you will pull the second strand over the first and the first over your middle finger.
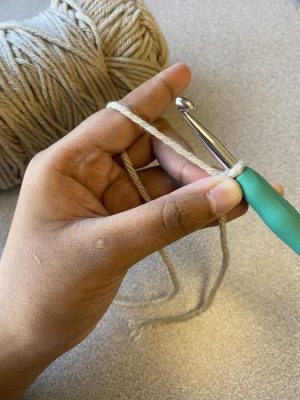
Then you put your hook in the loop, hook the free end and pull it through.
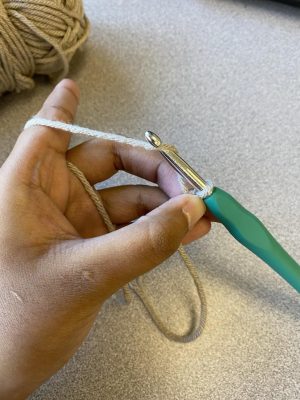
Pull the free yarn end to tighten the loop; it should be firm, but loose enough to slide back and forth easily on the hook.
Step 2
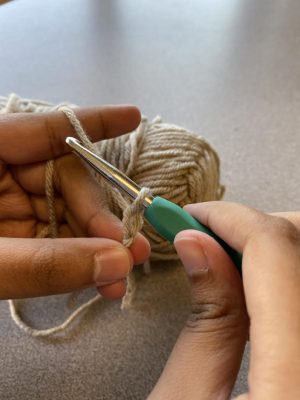
Next, thread read the yarn over the crochet hook from back to front and hook it in place.
Pull the hooked yarn through the loop of the slip knot on the hook and up onto the working area of the crochet hook.
Now you have a chain stitch.
Repeat what you just did. Thread the yarn over the crochet hook while holding the base of the slipknot.
Hook it and pull it through the loop.
You’ve made another chain stitch.
Keep in mind that every time you stitch once or twice, you should always move your left thumb and index finger over the chain near the crochet hook.
This helps you manage your work.
Also, be sure to pull the new stitch into the work area of the hook.
Otherwise, the first chain stitch will be too tight.
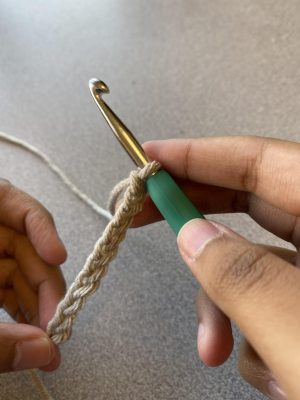
This is 10 chains and you can make more if you wish.
Practice making the chains until you are comfortable with the grip and flow of the crochet hook.
For a beginner, some chain stitches are loose and some are tight, resulting in uneven work.
While crocheting, try to loosen the chain stitch.
As you improve your skills, the chains should not be too tight and all chain stitches should be the same size.
Step 3
Now we can begin single crocheting.
Skip the first chain from the crochet hook, insert hook in the second chain under the loop.
Bring the yarn over the hook from back to front.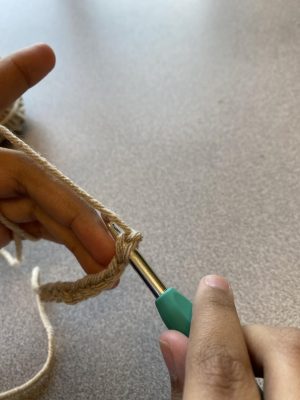
Draw yarn through the chain and up onto the working area of the crochet hook.
You now have two loops on the hook.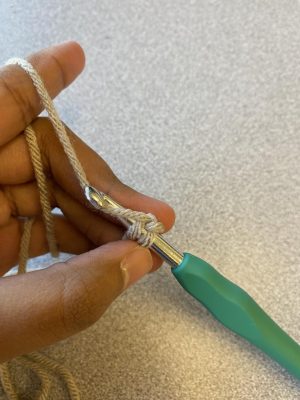
Again, bring the yarn over the hook from back to front, and draw it through both loops on the crochet hook.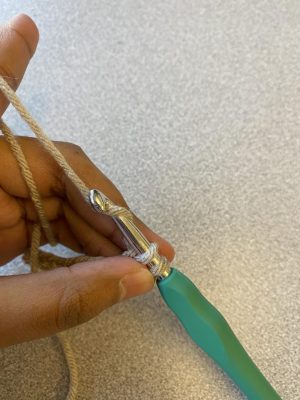
You have now made one single crochet and one loop should be on your hook.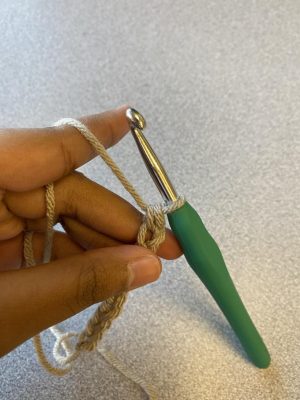
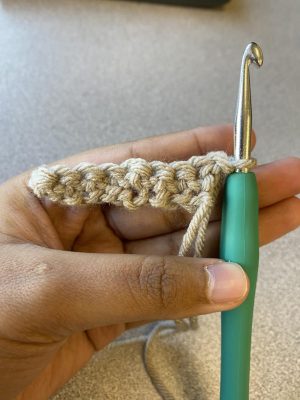
Repeat until you finish your row and it should look like the picture below.
If it doesn’t, don’t feel discouraged because practice is essential.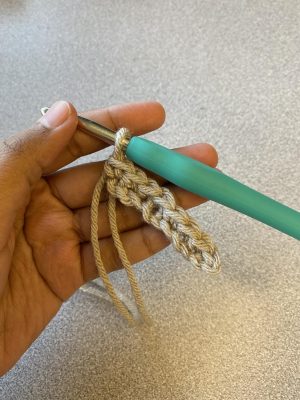
Step 4
If you want to make another row, chain one and flip your work.
That will get you started for your next row.
Then you will just single crochet like before without skipping any chains.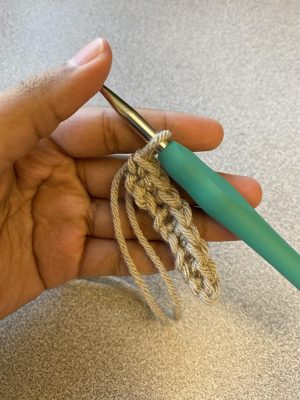
And finally, you will reach the last stitch of the previous row which you will single crochet in.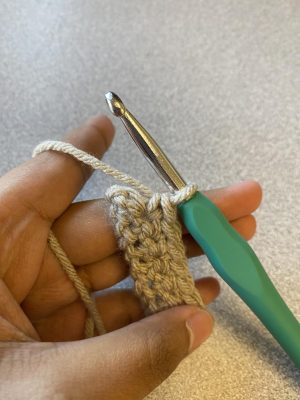
There you have it, a single crochet swatch. The picture below is a third row.
You can continue making more rows or you can unravel the yarn to practice your chain stitch.
If you’re still struggling, YouTube videos may help.
Next Steps
If you want to continue, there’s more stitches to explore.
There is half-double and double crochet which will allow you to make a variety of textures with the yarn.
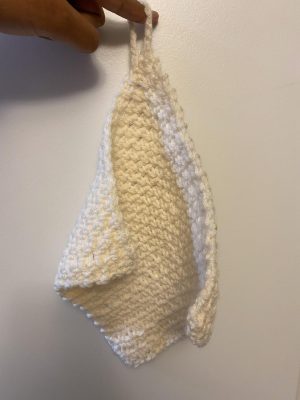
The best beginner projects would be a wash cloth, coasters like the one below or a bucket hat like the one above.
You can find tutorials on how to make those and many more items on YouTube, books, or blogs.